1. Ink.
2. Thoroughly blending all of the dry ingredients into the linseed.
3. Spreading the ink onto the plate, into all of the etched and incised marks.
4. Using scrim to remove the ink from the plate's surface.

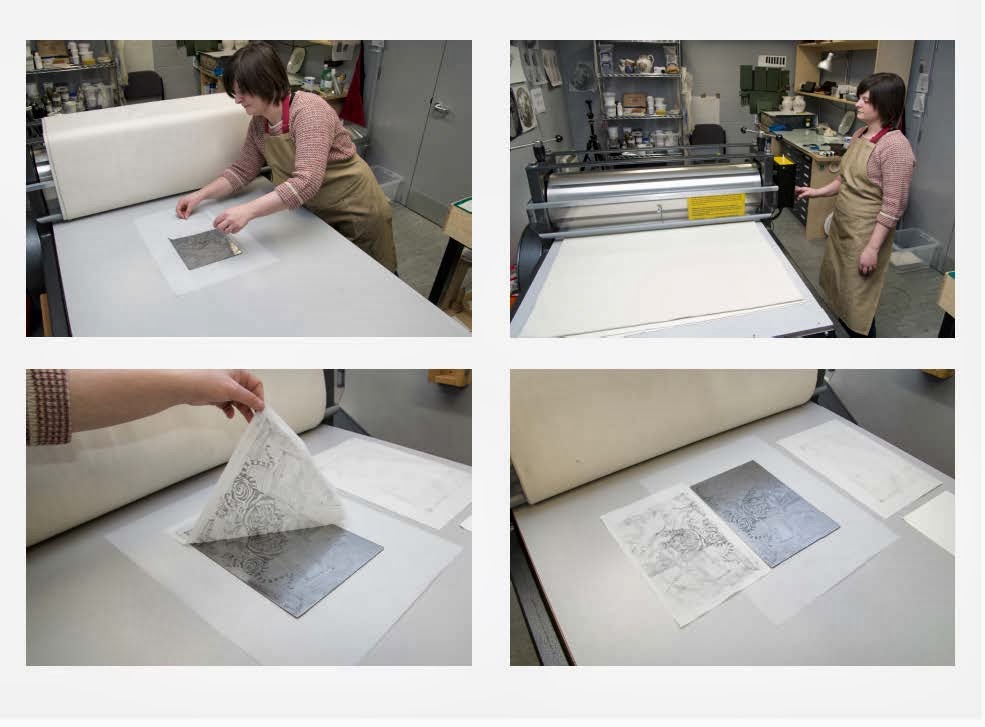
5. Laying the tissue onto the inked and wiped plate.
6. Running the plate and tissue through the press, under the felt blankets.
7. Lifting the printed tissue from the plate.
8. The print, alongside the plate.
 9. Trimming the tissue to size.
10. Rubbing the back of the print to position the ink onto the biscuit ware.
11. Applying pressure to the back of the print by brush, ensure a good contact.
12.Washing the tissue from the newly transferred ware. The ware is now ready to be fire, hardening the coloured stain to the biscuit.

No comments:
Post a Comment